This post may contain affiliate links meaning if you buy something by clicking a link, I may receive compensation. Please see the disclosure policy for more information. All opinions are 100% my own because why promote something you don't love!
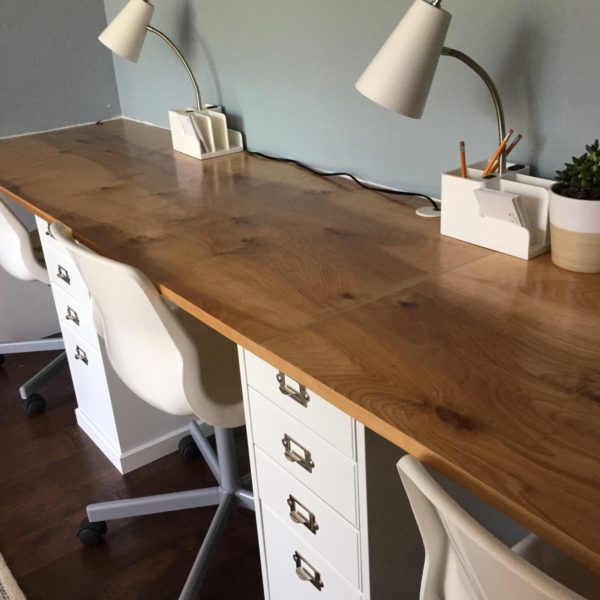
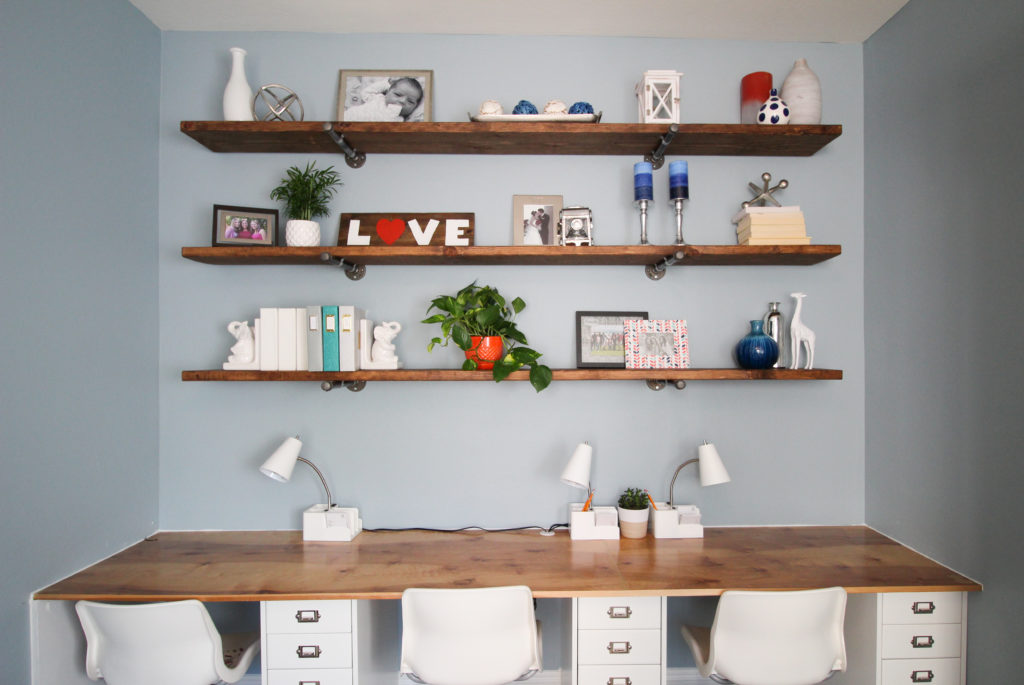
The day is finally here! I am ready to debut my new home office renovation complete with freshly painted walls, wood floors, built in desk for the kiddos, industrial wood shelves with galvanized pipe, and painted cabinets. You can check out the specific how-tos for the built-in desk, shelves and cabinets in these previous posts:
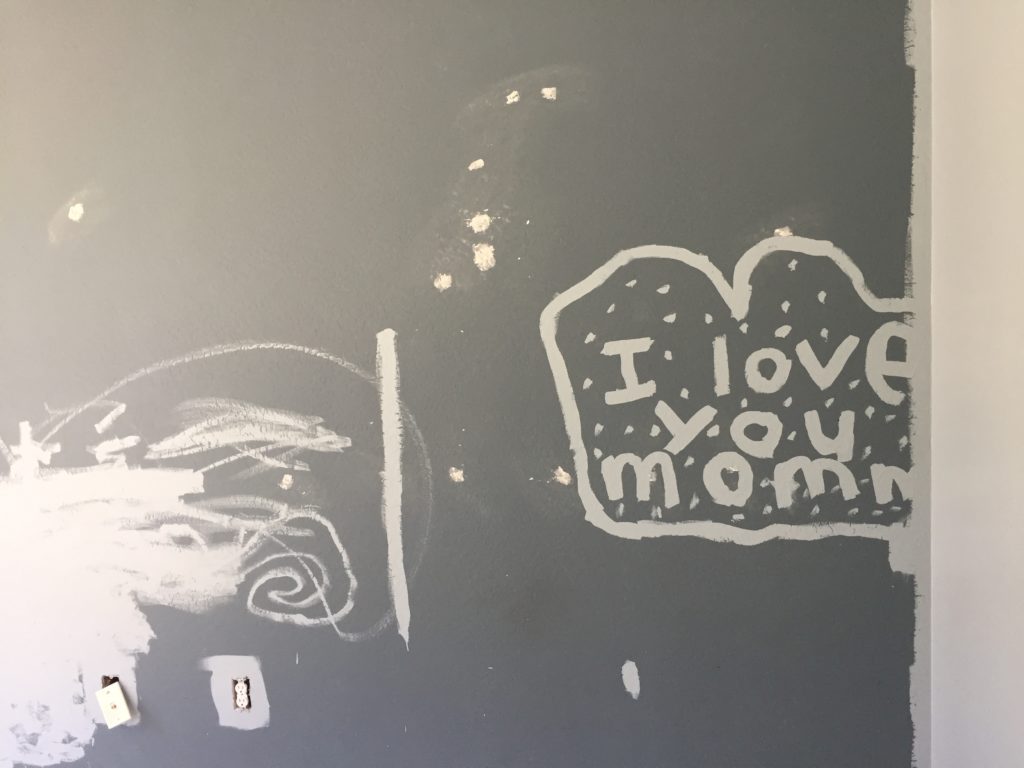
Today, I want to start from the beginning and this photo is the beginning.
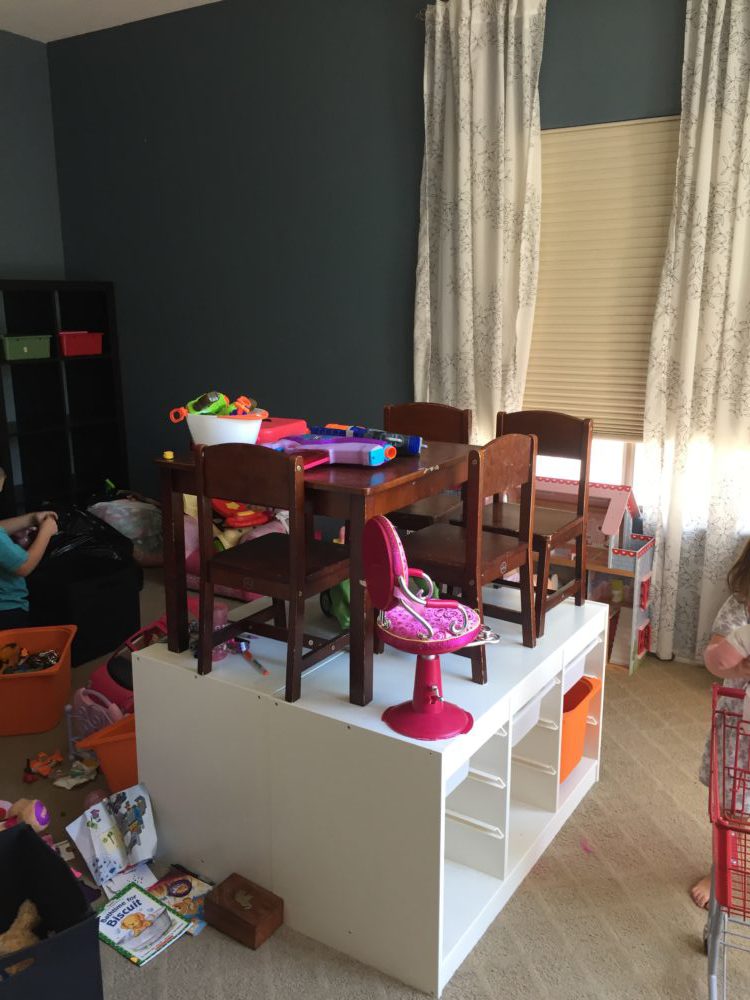
Disaster, am I right?!?!
You can probably tell that this space did not start as an an office. Long ago, when we first moved into the house 9 years ago, it was my home office and craft space. This was when we were only dog parents and had no kiddos. Fast forward to baby mania, and we quickly shifted this space, which is right off our kitchen, to a toy room/play room. My office was moved upstairs to the loft because it made more sense to have the kids close.
Now that the kiddos are bigger and we have only one baby left, we thought the upstairs loft would be better for the kiddo’s toy storage and hang out space, giving me back a downstairs office [with a door!]. We also wanted a homework and craft space for the kids that was on the main level, so this decision was just right.
I really wanted a space that was functional but also aesthetically energizing and fun. I didn’t want to just move everything downstairs and call it good. Plus, I love planning just about ANYTHING, so planning a new office sounded like my kind of fun.
THE PLANNING STAGE
About a year ago, with the goal to replace all of the carpeting on our first floor, we bought all of the wood we would need for all carpeted spaces and just stored it. [We started the first carpet to wood transfer with the living room/dining room…more on that in a coming post.] We were worried about discontinued product and product lots not matching, so we just bought it all knowing that we would eventually get to all the spaces. The wood is a hand-scraped, engineered, locking hardwood, and the wood is birch. The color we chose is called Cinnamon, and it is on the darker side with some light spots [we chose this to hide dust and dog hair…it has worked really well so far].
With the wood floor pre-selected, our next step was paint. The room was already a blue color, but I felt like it needed to be lighter. We selected the color Half Sea Fog by Behr which is a medium grayish blue.
I always STRESS when I am planning for a room renovation and have to choose paint. Even though I like the tiny swatch or even the small plot painted with a sample jar of paint, I never REALLY know what the color will look like in the room until it is full up on the wall. ALL THE WALLS. Will it be too grey, too purplish, too ashy? THANK GOODNESS this color turned out perfect!
I then did a little “mood board” to see what the chair, curtains, curtain rods, and rug I had selected would look like together and to get a better feel for the room. After I put it all together, the room felt white and bright, but also a little traditional for a room with daily kiddo activity.

Curtain | Rug | Curtain Rod | Chair
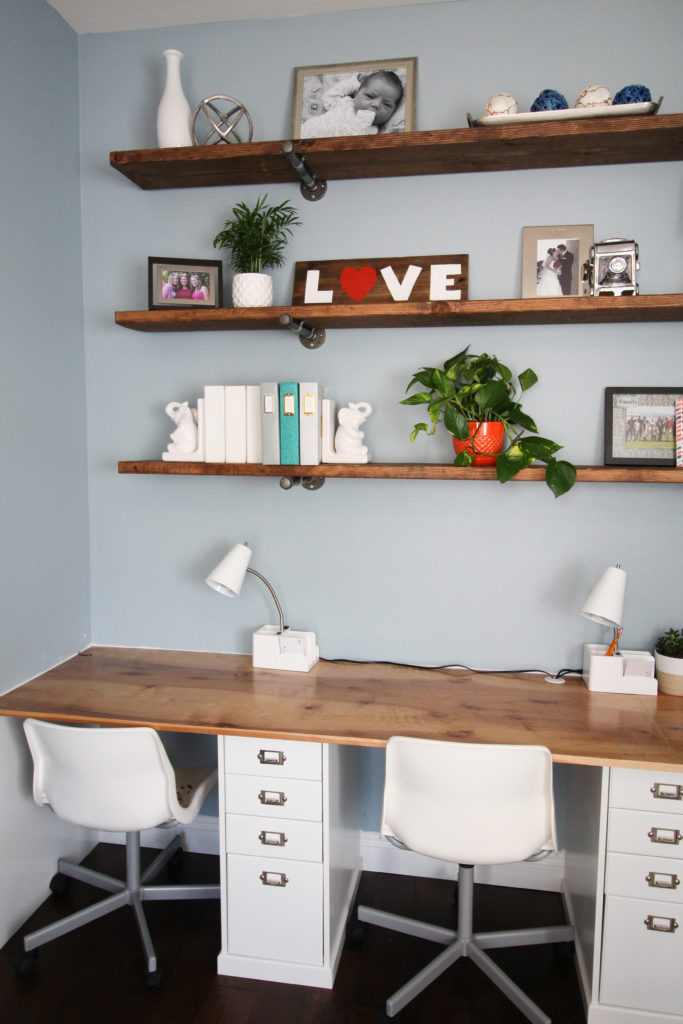
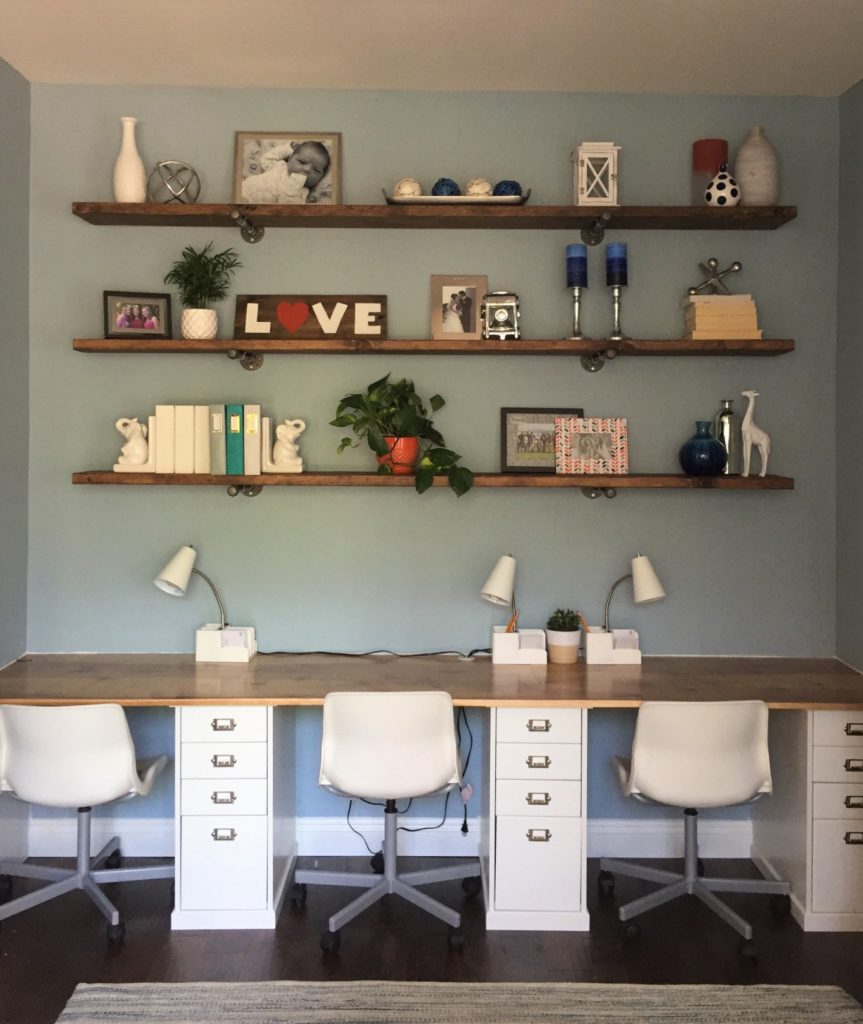
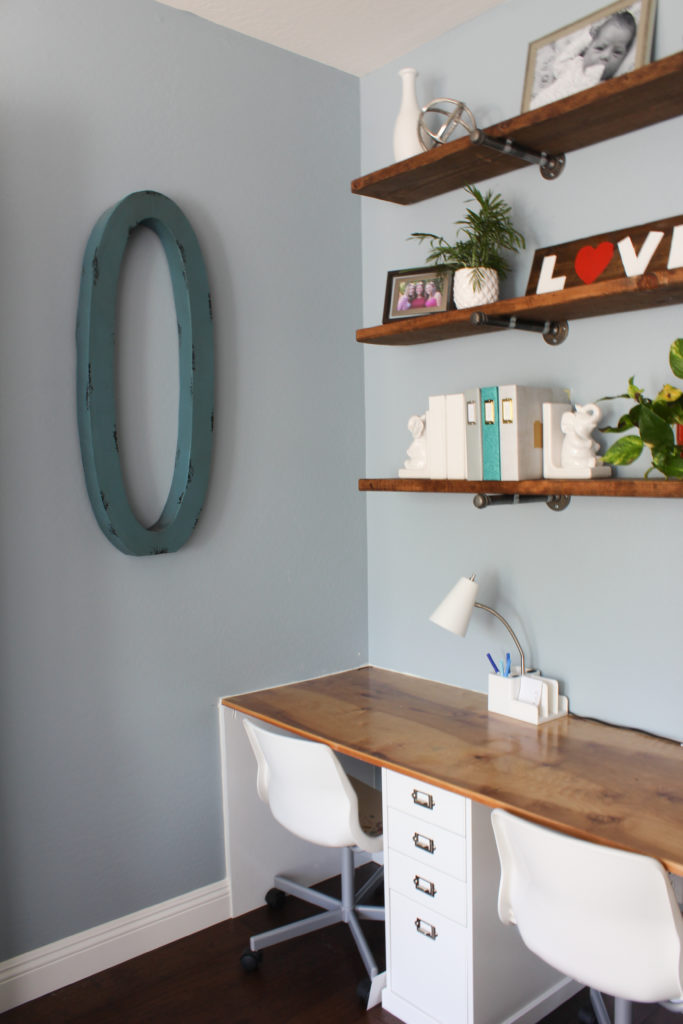
As we started the plans for the built-in desk and the built-in shelves we made sure to add some non-traditional elements to keep the office from being too formal or stuffy. [You can get the full details on those in the posts above and below].
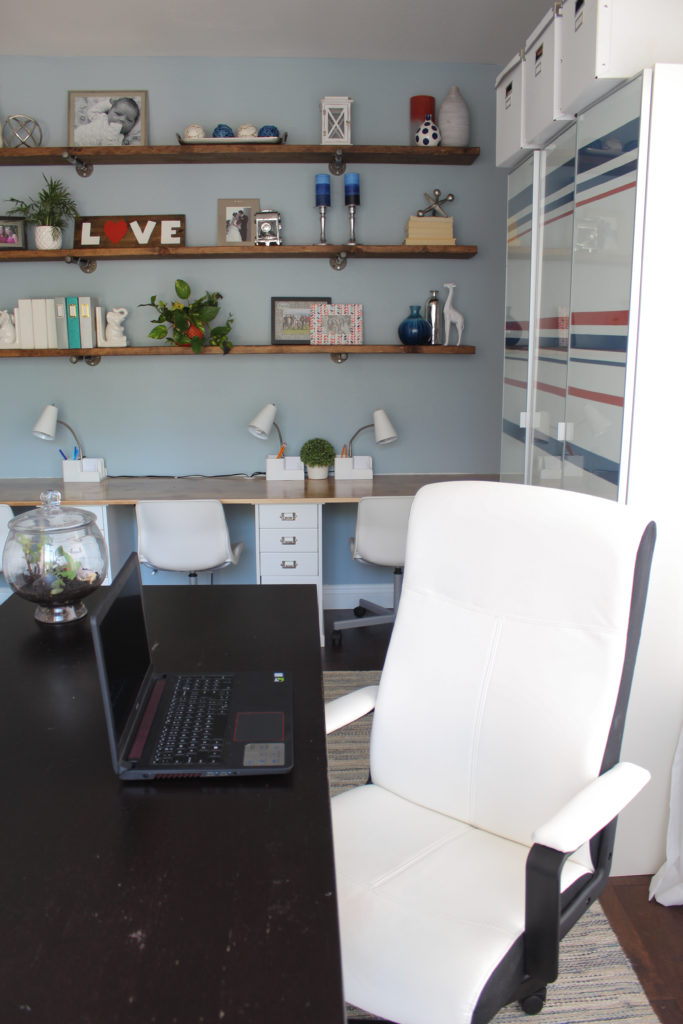
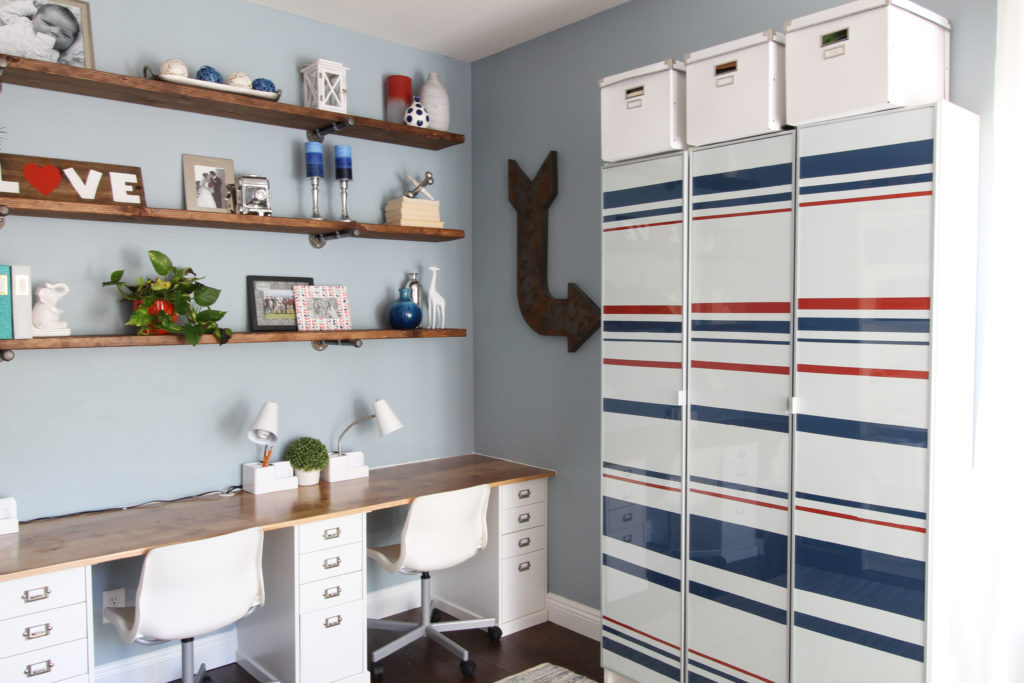
Finally, we decided which furniture from the old office would stay including the IKEA BILLY bookshelves and the IKEA desk. In this post, you can see that we added some fun asymmetrical stripes to those BILLY BOOKCASES to break up the white on white of the initial shelves.
THE DEMO
Our kiddos LOVE demo! They want to help with the whole thing from pulling up carpet, scraping up glue and carpet pad, removing baseboards, using tools, and using the ShopVac. Of course, if you have kiddos help with these tasks, make sure they are wearing appropriate shoes, wearing masks, wearing gloves, or using other appropriate safety gear.
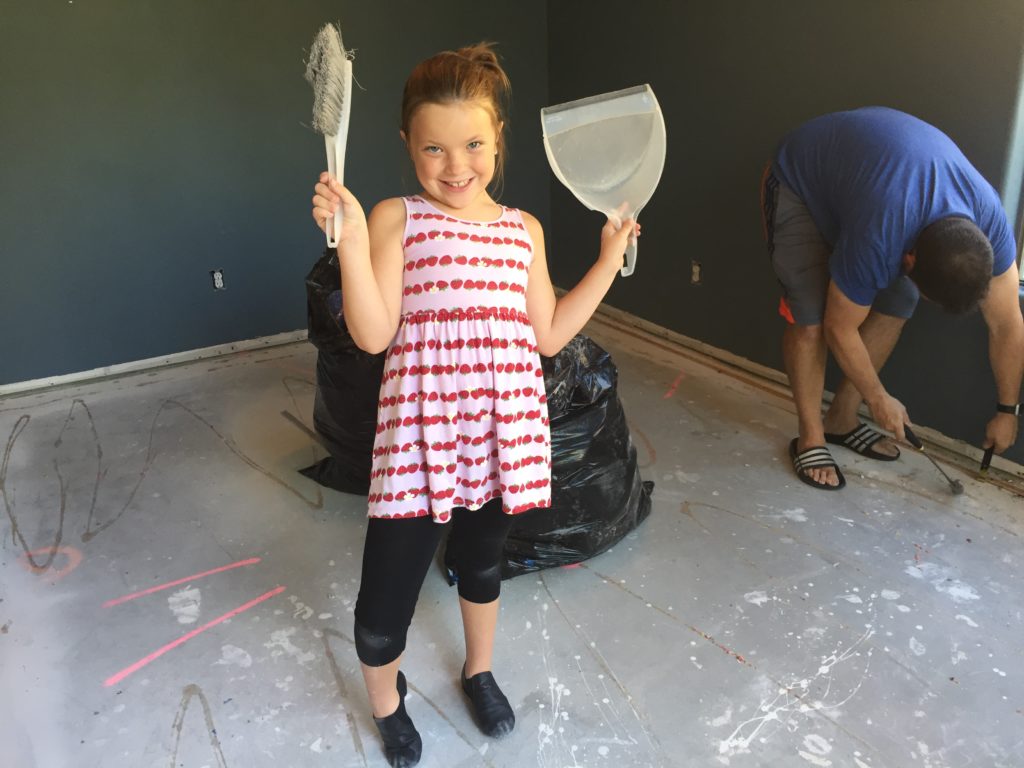
After we moved out all of the toys and shelves, we removed all the carpet, carpet pad, moldings, carpet tacks, and nails. After a good sweep and vacuum, we were ready for wood install. [Note: If your floor is not level, you have more work to do here. We were lucky.]
THE PAINT AND WOOD INSTALLATION
The kids really wanted to help with painting. We knew they were not quite old enough to use a brush or a roller confidently or with very much accuracy [you will remember our oldest is only seven]. So, since the room was just cement at this point, we let them paint their own pictures! They thought this was awesome!
Once they were done with their masterpieces, I did the real painting. For any project we have done in our house thus far, we have been on a budget. We pretty much exclusively use Behr paint from Home Depot because there are plenty of color options, and the price point is great for budget friendly projects. This time, we decided to try out Behr Marquee because it was reported to cover in a single coat. We wanted to test it out!
You. Guys. This paint was awesome! One coat over our darker blue color and not a single touch-up needed. Boom. Done.
Although our last wood floor installation was done as a floating floor with an underlayment, the hubs really wanted to glue down this floor. If you have never done a floating floor, it is great, but it can have small movements that don’t allow it to be perfectly quiet when walking on it. He wanted to see if the glue down would be a better option. [Spoiler alert: It was way messier but feels so much more stable high quality than our floating floor.]
He installed the floor, and after 24 hours, we were ready to install the baseboards and molding. We upgraded from our tiny builder-basic baseboards to some nice 5-inch ones. They make ALL the difference.
THE FINAL STEPS
As I noted before, the full details on the built-in desk, industrial shelves, and painted cabinets can be found in these posts:
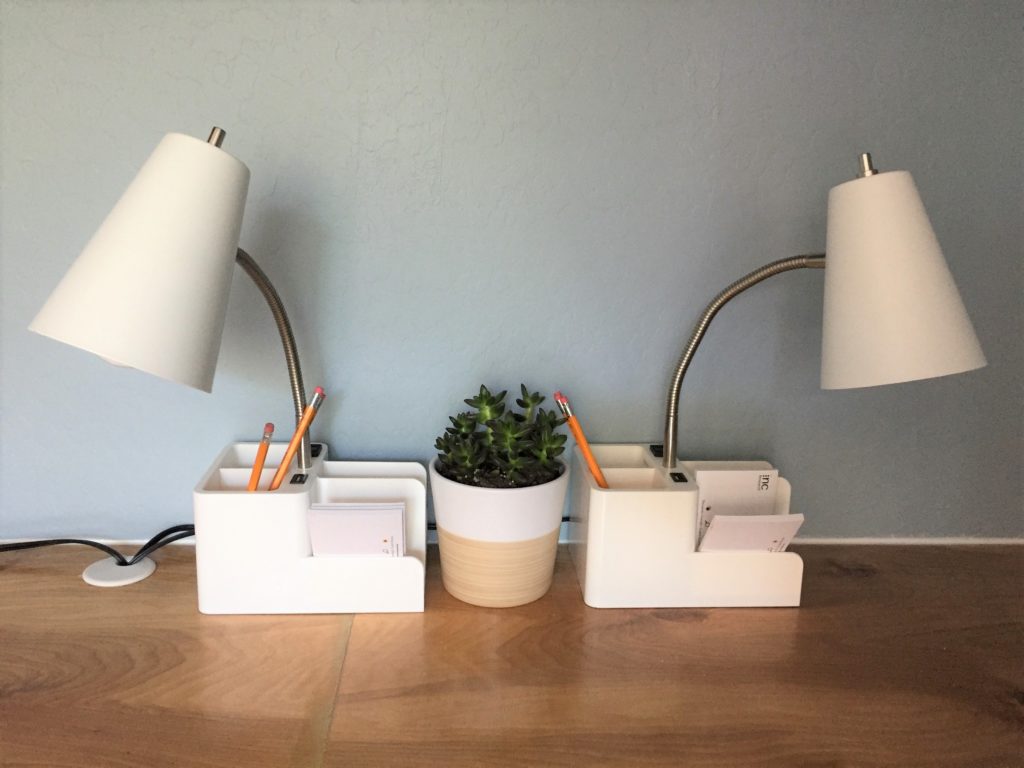
With all those furniture items complete, we brought in the curtains, rug, décor, lighting, and of course filled the cabinets with our work and craft supplies.
Now for photo overload of the final room!


Disclaimer: We are not carpenters or general contractors. We have provided the steps we used for our home office project but cannot guarantee the same results in your project. We wish you luck!