This post may contain affiliate links meaning if you buy something by clicking a link, I may receive compensation. Please see the disclosure policy for more information. All opinions are 100% my own because why promote something you don't love!
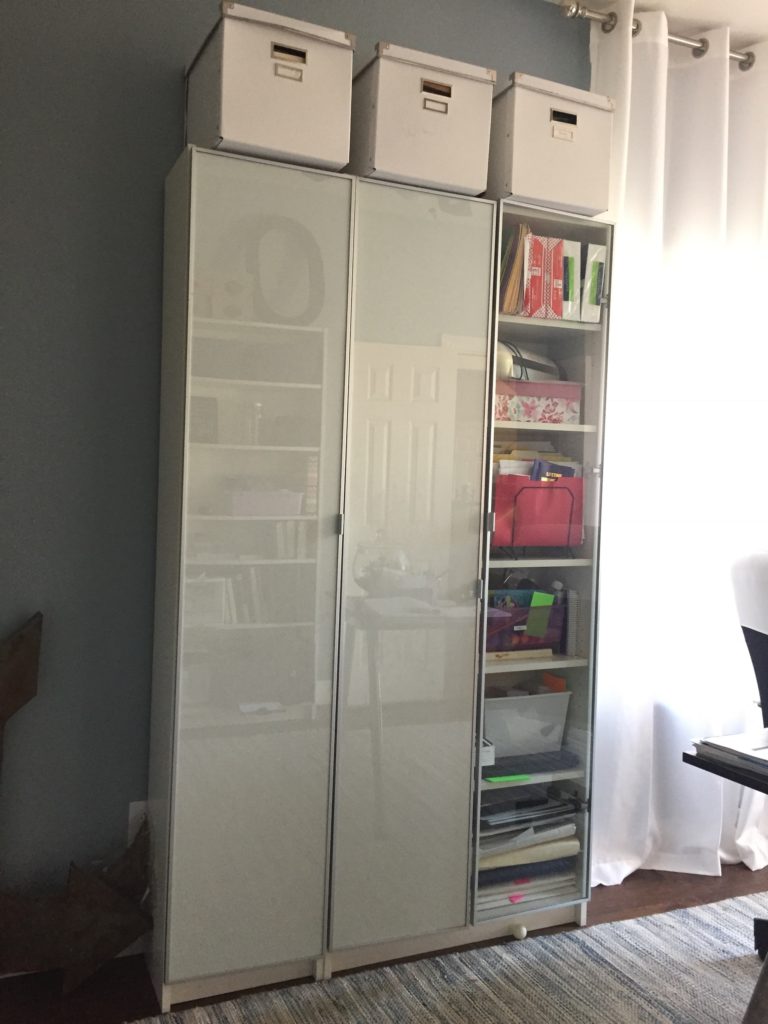
We have been working on one final piece for our home office reveal before we are ready to share the whole room from top to bottom. We shared this photo to see if anyone could guess what we might be working on, but no one guessed right!
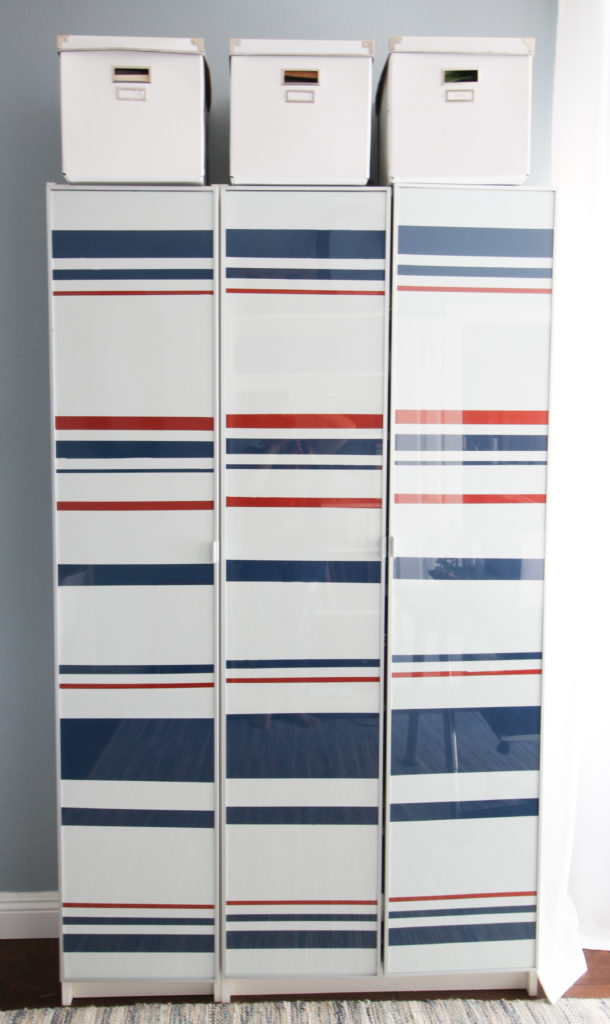
Our last step was a set of DIY painted cabinets!
We have owned the IKEA BILLY bookcases for years and had them installed in my last home office. However, they looked totally different and here’s why: the glass cabinet doors for the IKEA BILLY bookcases are 100% customizable! Let me show you what I mean…
Here is a shot of my old office [mind the photo, the mess, pretty much everything!]. You can see in this photo that the cabinets used to be a black and white pattern. We actually covered the panel on the inside of the glass door with wrapping paper in this pattern.
The panel inside the bookcase door is white on one side and black on the other side. The intent is that you can either remove the panel and have a clear glass door, insert with the white side visible for a white cabinet or insert with the black side visible for a black cabinet. [You can see what that doors look like with and without the panel in this photo.]
But! You don’t have to just stick to black or white. You can cover the panel with whatever you want! As I mentioned, we went with wrapping paper the first time around. Here are some other ideas you could use:
- Colored or black and white wrapping paper
- Wallpaper
- Printed photos
- Printed artwork
- A printed calendar (you could add it to a single panel or print it over multiple sheets and have it span multiple panels)
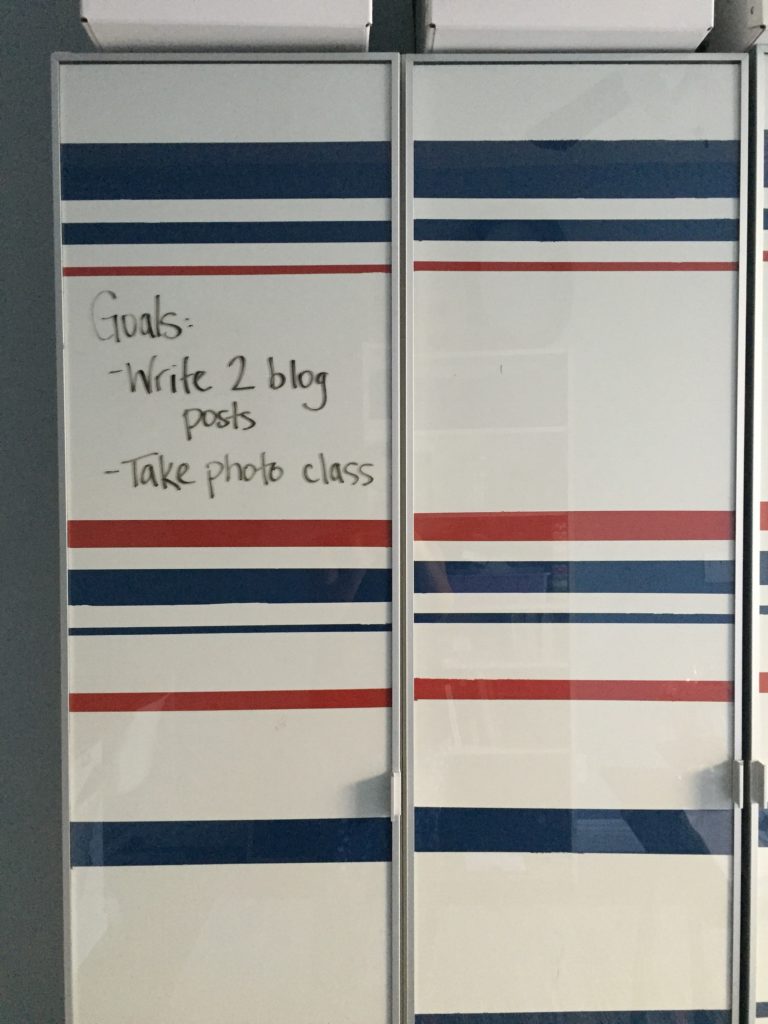
- Lines for list making (You can write on the glass on top with a dry erase marker)
- Any shape or design printed and cut from construction paper or scrapbooking paper
- Newspaper
- Book pages
- Adhesive vinyl cut by hand or with a machine like a Cricut or Silhouette
- Paint
Well as you can see, we chose to paint the second time around. When we initially installed the cabinets as part of the office renovation, we inserted the white panel. However, this made for A LOT of white. I felt like it needed more of a color pop! Since we had chosen blue and orange accents for the room, I thought a well-spaced, asymmetrical stripe would keep it fresh and fun, without color overload.
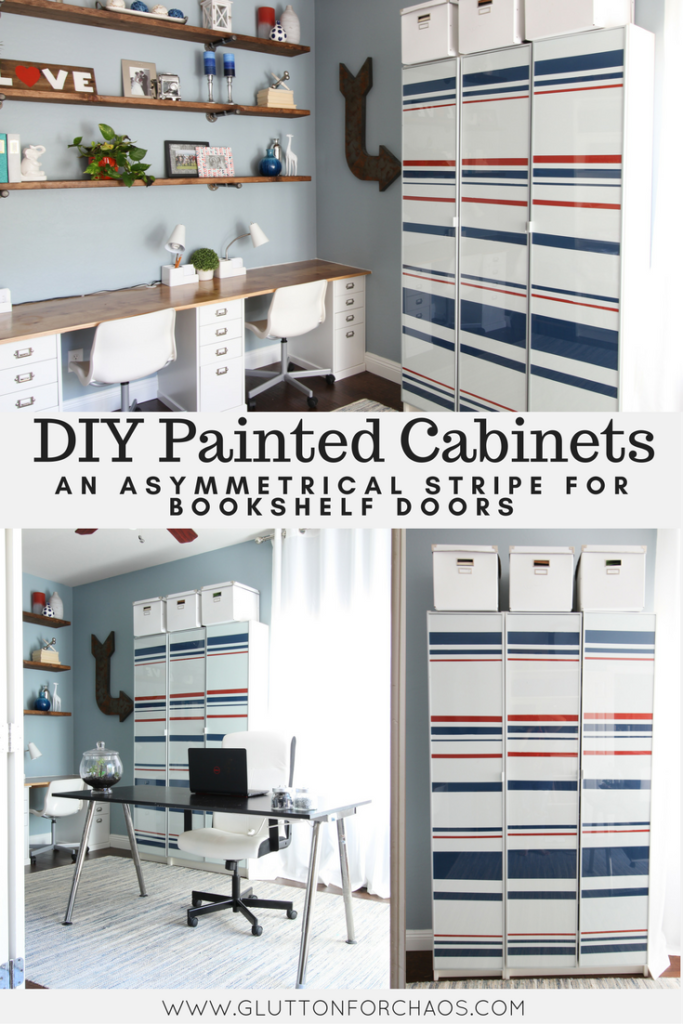
Steps to Create DIY Painted Cabinet with Asymmetrical Stripes
- Remove bookcase panel, and lay on a flat surface.
- Tape off lines in desired pattern using painters tape (We used Scotch Blue 3/4-inch painters tape, but you could use wider tape depending on your pattern). It may help to draw this out in advance to make sure you have the look and color pattern you want.

- Paint desired colors into pattern and let dry. Depending on the paint you use, you may need additional coats. Some tips:
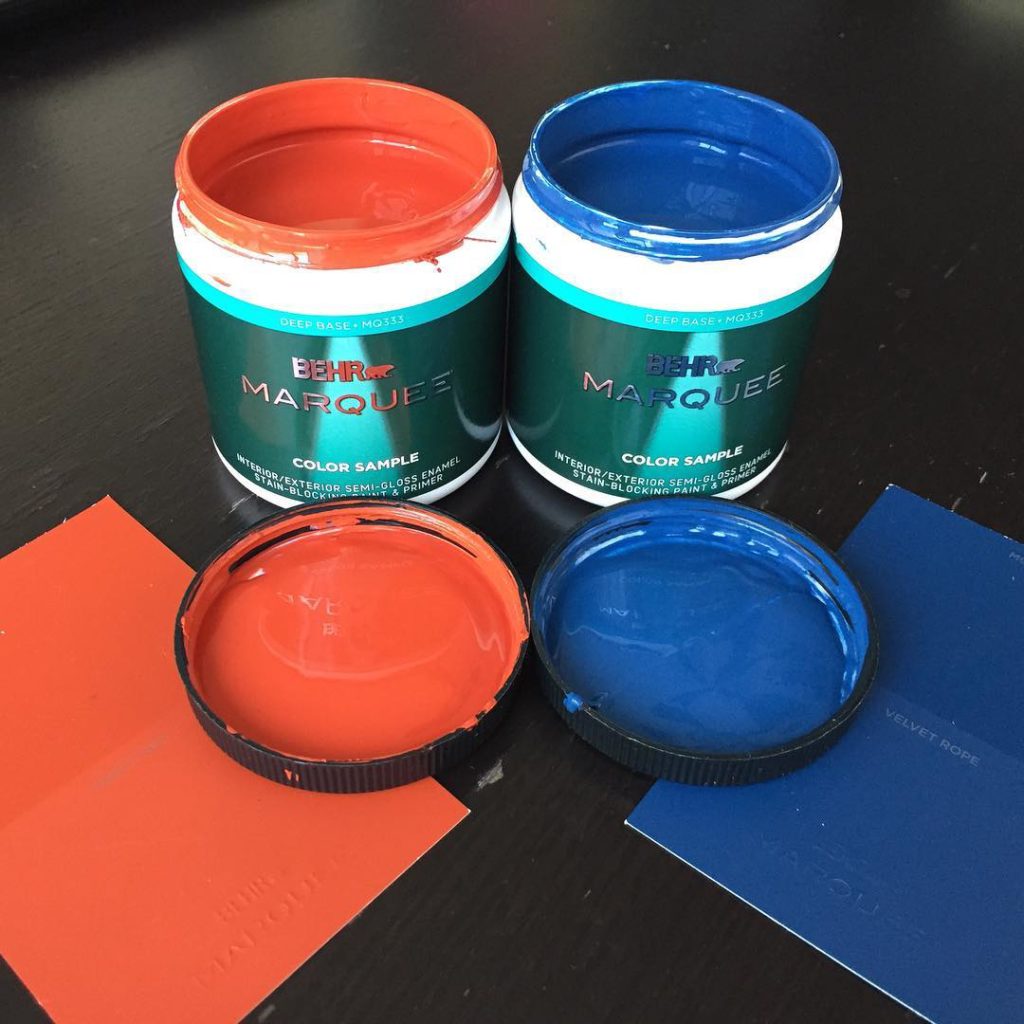
- We used Behr Marquee Interior Paint
and ordered a sample of each color. [Our colors are Velvet Rope and Torch Red.] This is a cheap way to get the perfect color in a small quantity if you are not painting a whole wall but need quality paint.
- If you have ever painted a wall, you know that most painters tape is not leak proof. Some paint may leak through causing an imperfect line. I did a trial run with one of the panels and had some leaks. I solved this by painting a thick coat of clear Mod Podge over each spot intended for color. This filled the spaces with a clear layer and allowed for a perfect line.
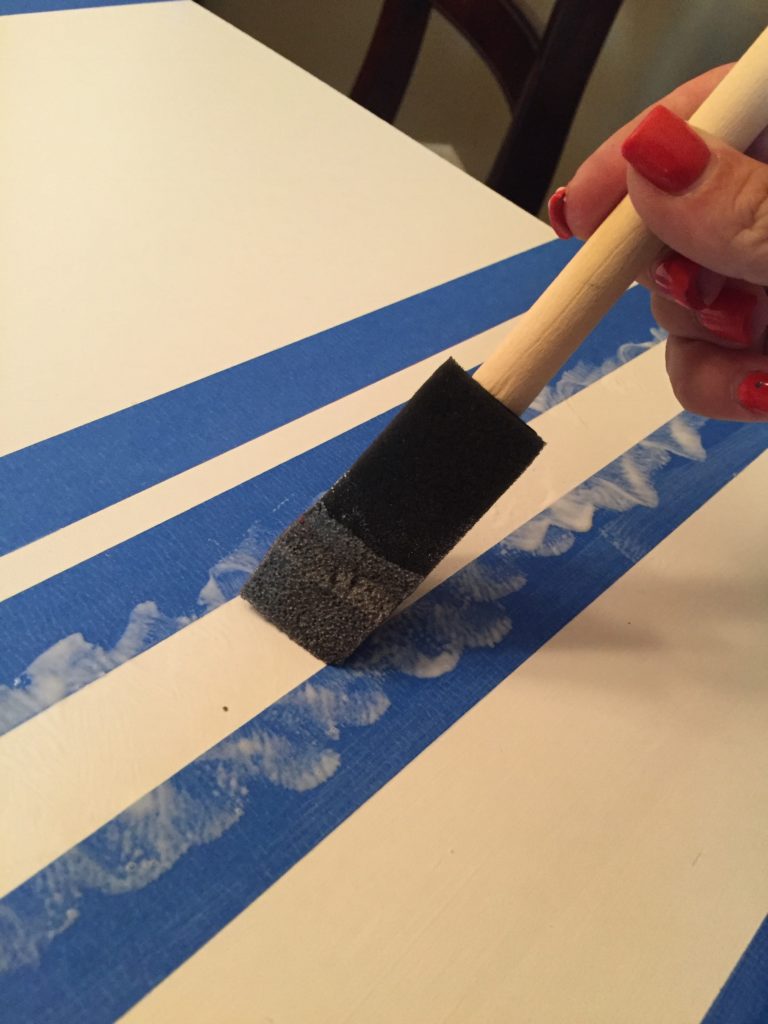
- Thin coats of paint are best, even if it requires multiple coats. If your paint is too thick, it may peel off when removing the tape. NOT ideal.
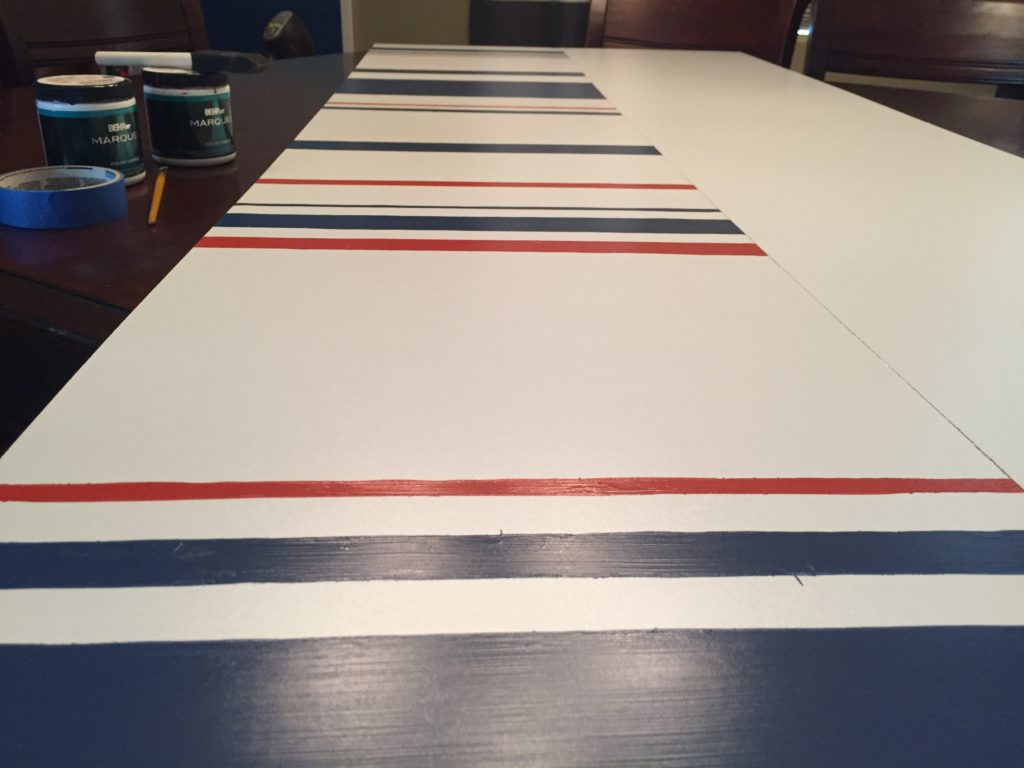
- We used Behr Marquee Interior Paint
- Once all coats are completely dry, remove the tape and install into the glass door panel.
I love this because it was easy, and we can still change it up in the future. I also love that we can use a dry erase marker to write notes, goals, and to-dos right on the cabinet. For a home office, this is super convenient.
As our last home office project is now complete, we can’t wait for you to see the final, full reveal and photos. Stay tuned!