
This post may contain affiliate links meaning if you buy something by clicking a link, I may receive compensation. Please see the disclosure policy for more information. All opinions are 100% my own because why promote something you don't love!
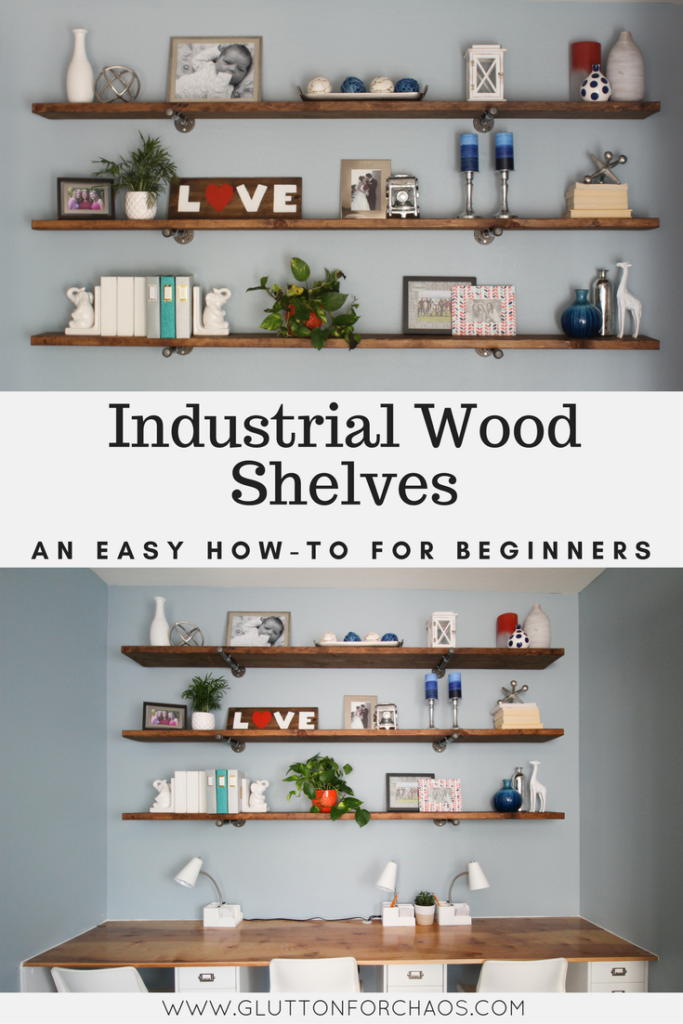
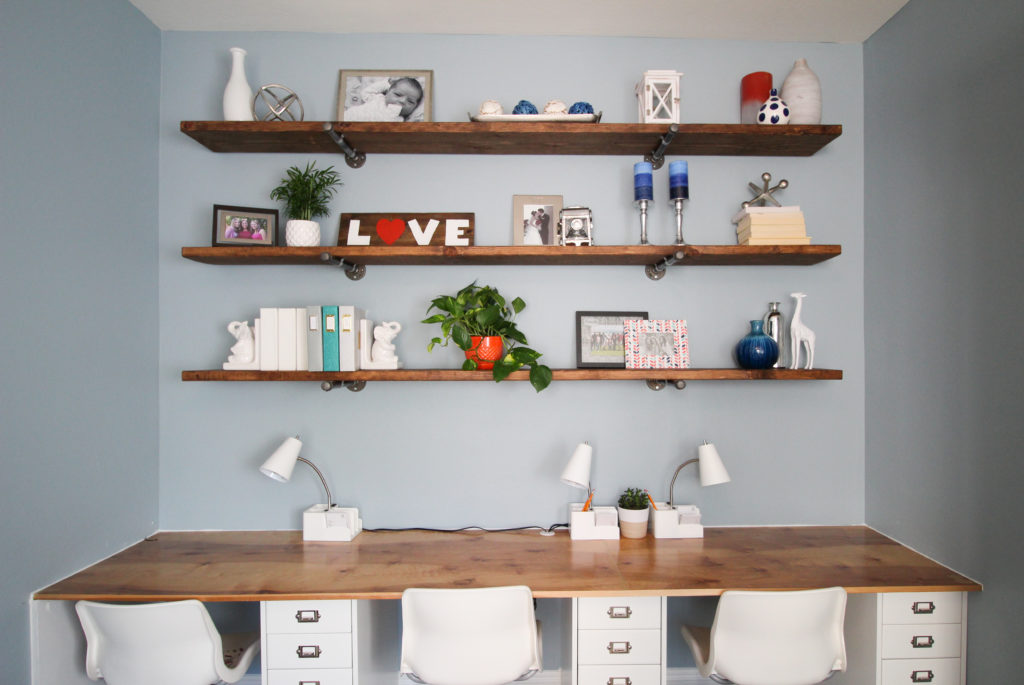
The industrial wood shelves. The SHELVES! These are likely going to be my most favorite part of the home office, despite the fact that we are not 100% done just yet. I am dying for you to see the whole new home office, including a built-in desk, open DIY industrial wood shelves, and painted, striped cabinets! Until we are completely done and ready for the FULL office reveal, I am so excited to share the built-in shelves. You will be stunned at what a fast and easy project this can be!
As we were planning the home office renovation and deciding what was really important to us, we knew we needed some storage. Although I had storage in my last office in our loft space, most of it was enclosed. This is great for all of the paperwork, craft supplies, and art supplies I need to store so things do not look horribly cluttered. However, this is not great for having pretty things to look at during my day. I think I need a balance between functional and beautiful, especially when this is where I spend so much of my day.
With this in mind, I really wanted to have some open shelving that allowed for photographs, plants, and pretty things, as well as storage for things like books and photo albums. I also thought the open shelving would help the room feel open since it is a fairly small office, and we knew the other cabinets in the room would be enclosed.
To gain some inspiration and get the feel we were going for, we headed to Pinterest. I love how Pinterest is no longer a “girls” site, but that you can find literally anything there. I also love this shift because my husband now has an account, and we have a shared board where we can share inspiration with each other. This is super fun since he travels a lot, and we are usually brainstorming and house-dreaming apart from each other.
There are 1000s of options on Pinterest. I have spent One could spend HOURS searching built-in shelves and industrial wood shelves. You can install the shelves floating or use some type of bracket, “chunky” instead of using a single board, surrounded by molding or fully open, and the list goes on. We needed to narrow it down.
Although I really love the look of floating shelves and there are plenty of tutorials online to get these right, I felt like some hardware would really give the look a bit more of an industrial vibe. I knew some of our other pieces in the room were a little traditional, so I wanted to make sure it wasn’t too formal. After all, this space is for me but also for the whole family.
We went through loads of inspiration photos and different types of hardware but ultimately decided on galvanized pipe with clamps. We also decided that the shelves would be stained a color in between the lighter wood desk top and darker floor. We wanted the space to stay warm but the wood grain to show through. After decisions were made, we could not wait to get started!
Supplies to Create DIY Industrial Wood Shelves
(3) 2-inch x 10-inch x 8-foot Douglas Fir Board
(1) 32 oz. Wood Stain (We used Minwax Wood Finish in English Chestnut)
(6) ¾-inch Black Galvanized Floor Flange Fittings
(6) ¾-inch x 12-inch Black Galvanized Pipe Nipples (*Note: These are the actual pipes but if you look for just “pipes”, you will only find 18-inch or longer. You definitely need to look for the ones called “nipples”.
(6) ¾-inch Black Galvanized Cap Fittings
(12) Pipe Brackets
Screws/Bolts
Step by Step Instructions to Create DIY Industrial Wood Shelves
First, we lightly sanded and stained the boards to they could be drying while we connected the galvanized fittings to wall. We did not use a polyurethane top coat as we had done on the desktop because a) we didn’t want the boards to be shiny and b) we didn’t expect that there would be spills or clean up on the shelves as was certain to happen on the desktop. Polyurethane can be tricky and can bubble. If we can forego it, we do.
To apply the stain, we used a brush over the top, sides, and ends and wiped off excess stain with a cheese cloth.
Next, we needed to determine if we could attach the pipe fittings directly to the wall (ie. the stud) or if we were going to have to figure out a different plan to ensure they were secured to the wall. Solid boards are heavy, and the pipe fittings need to be firmly attached to the wall. This is where we got insanely lucky!
We located our studs and found that they were about an inch off, meaning that one side would be about an inch closer to the side wall than the other. So, in some cases an inch is a deal breaker. Allowing an inch difference could make some projects look unbalanced or would decrease structural integrity. Not true for this wall! Can YOU tell that the pipes are not perfectly distributed? Nope. Neither can we. WIN!
We connected the galvanized floor flange, pipe, and cap together to create 6 individual brackets. We have noticed that some people in our inspiration rooms have spray painted these with either a metal spray paint or matte black. We really liked the look of the raw metal so we chose to leave ours as purchased. We did have to clean them up a bit because they come rather…dirty.
You will also notice that although we bought the galvanized pipe in the color “black” they are really more of a gunmetal grey color.
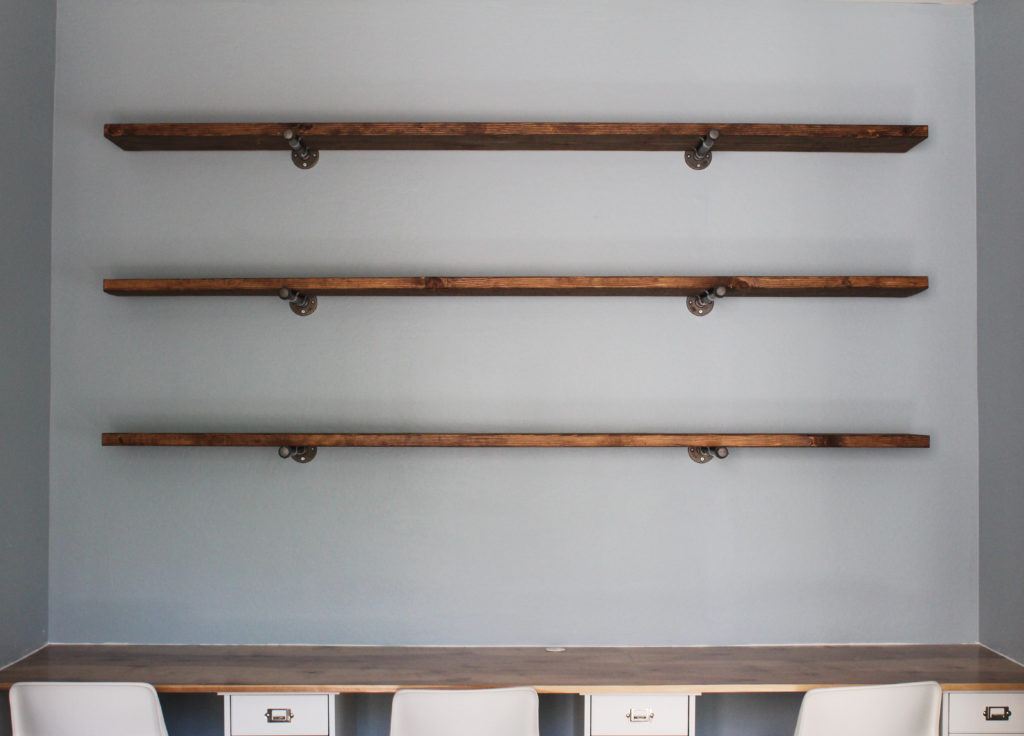
Next, we needed to decide how high above the desk we wanted the first shelf and how far spaced we wanted each shelf. For us, about 24 inches above the desktop with 18 inches between each shelf worked perfectly. You could definitely make them closer together and maybe even fit another shelf, but keep in mind that you might limit the collectibles and pretty things you can display based on height.
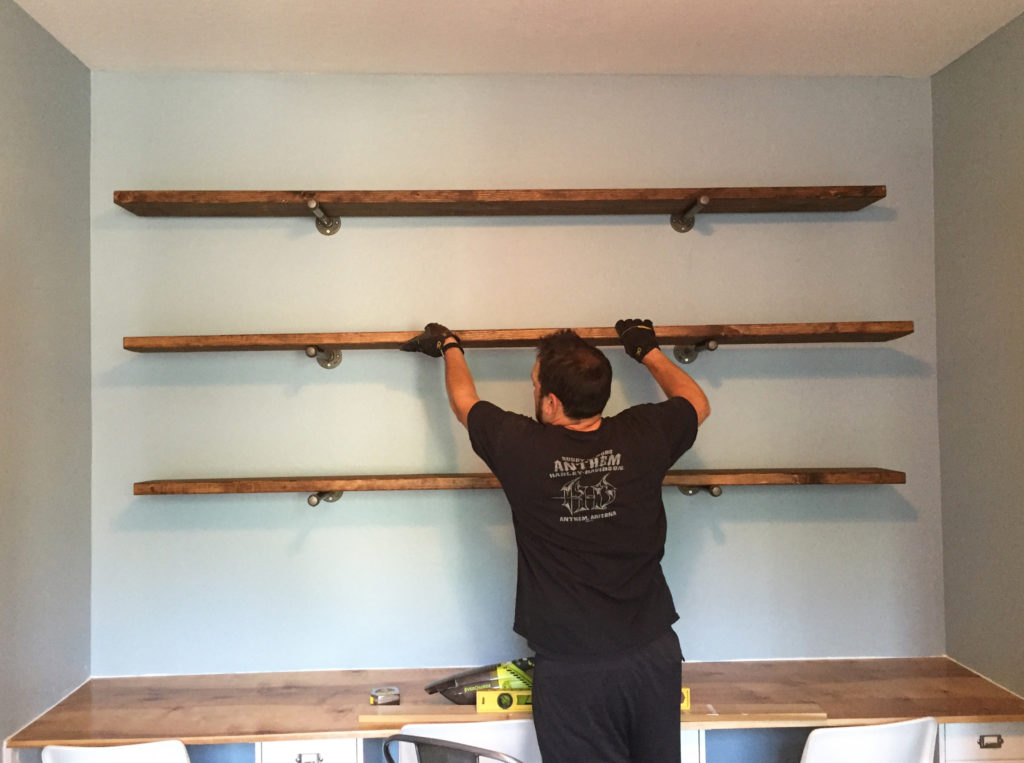
We installed the fittings to the studs ensuring they were level and, once the shelves were completely dry, we placed them on top of the fittings. Many folks we have seen are done at this point. So easy, right!?!?
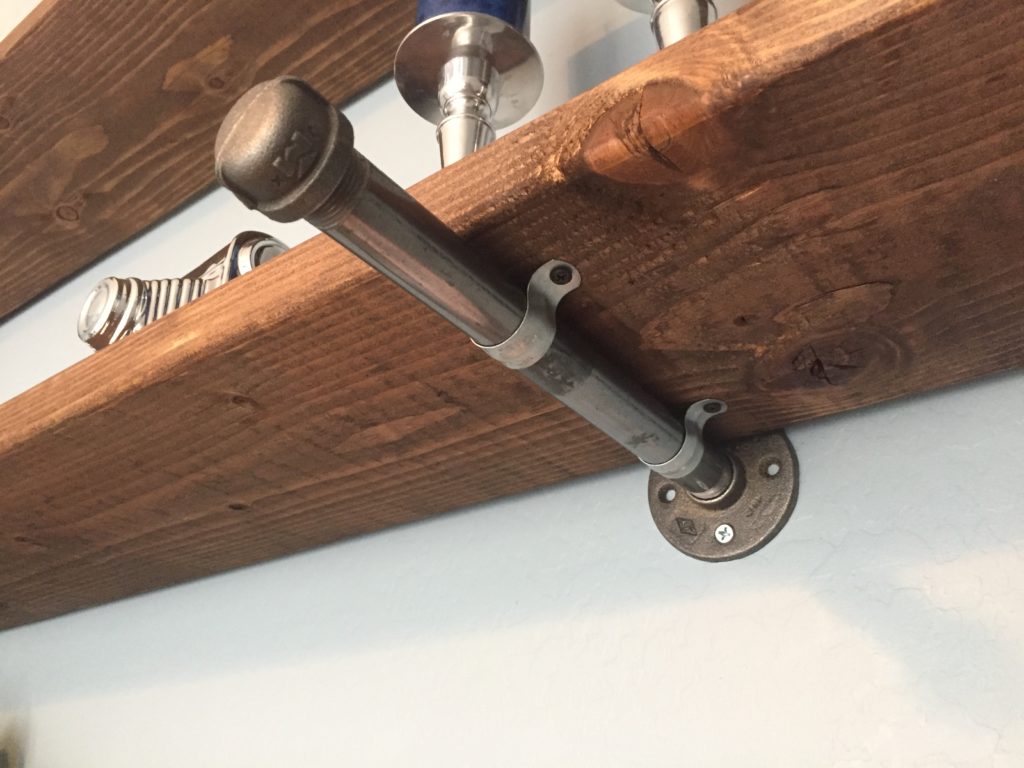
Since we have small kids and you never know what they might find fun to climb, we felt like the shelf on top of the pipe fitting with no connection was a recipe for disaster. We used two galvanized pipe straps per fitting to ensure the shelf and the fitting were connected and secure. You can pull hard on the shelves, and they are not coming down!
And there you have it! We would love for you to tell us what you think! Have you tried something similar? If you decide to install similar shelves, we would really love to see them!
Disclaimer: We are not carpenters or general contractors. We have provided the steps we used for our built-in shelf project but cannot guarantee the same results in your project. We wish you luck!


Pingback: Home Office Redesign with How Tos | Glutton for Chaos