
This post may contain affiliate links meaning if you buy something by clicking a link, I may receive compensation. Please see the disclosure policy for more information. All opinions are 100% my own because why promote something you don't love!
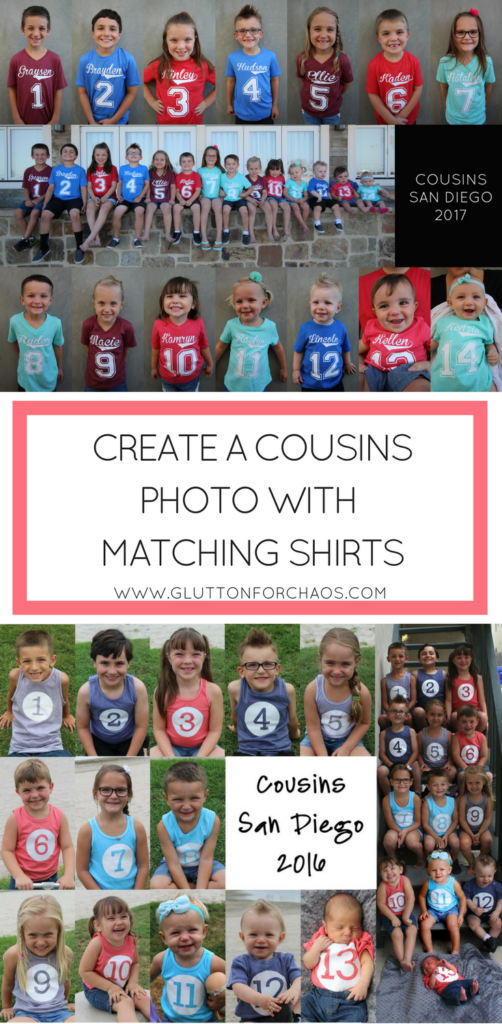
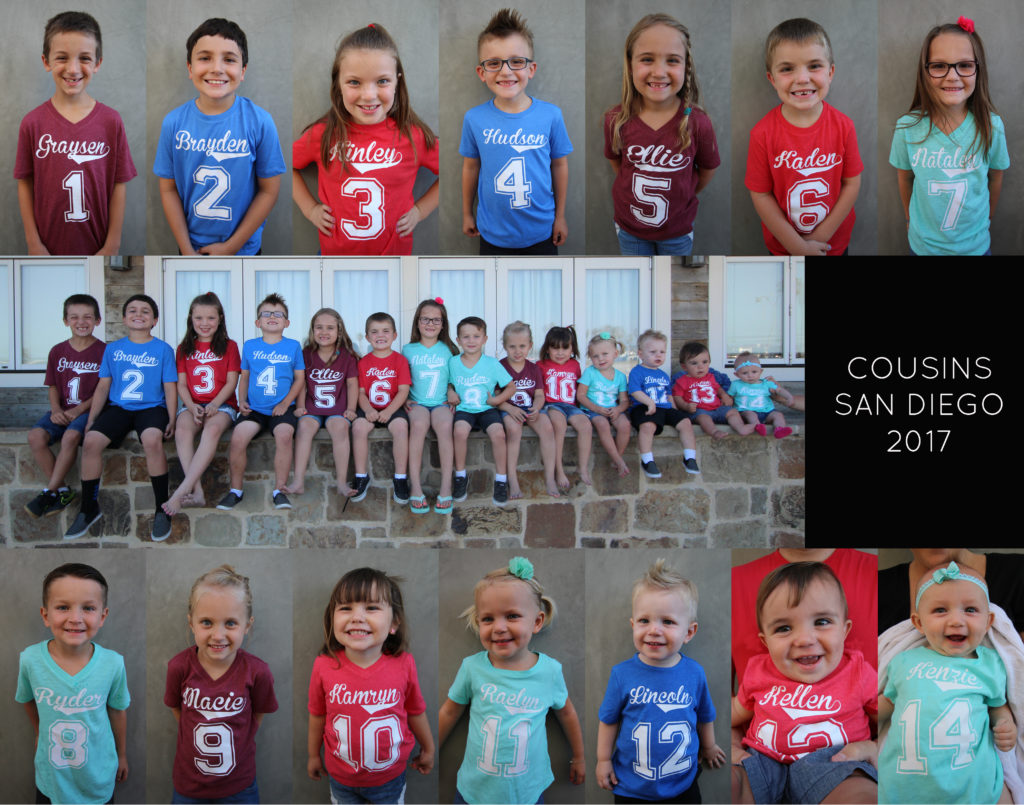
If you know me or have learned a little bit of my history on my About Me page, you know that I have a pretty big extended family. Between my brother, two sisters, and me, we have FOURTEEN cousins from ages 4 months up to 9 years old. (It would appear that I am not the only one who loves chaos.)
Every summer, we pack up the kids in a caravan of SUVs and head out of the sweltering Phoenix heat to the beaches of San Diego. We look forward to this trip to Mission Beach all year! It is the time when we all get to stay together, hang out on the beach, and let the cousins spend a solid week together fighting playing and having a great time!
It is also a time when I love to take lots of photos of all of the kids together for our annual family calendar. (I will definitely share more on how I create that in a later post.)
One of my all-time favorite things we have done is create special shirts for the trip to photograph the kids. The very first year, we had 10 cousins in the family. I had seen a super cute Pin on Pinterest from www.carolinaphotosmith.com in 2012 that had a group of kids in shirts with numbers on them. (Note: This link/Pin is no longer available but there are similar images on their site).
I thought, “How cute would it be to make different colored shirts for each family and number the kids from oldest to youngest!?!?”
I found matching white T-shirts at Walmart, bought some Rit Dye, and some all-white iron on transfers meant for dark colored clothing and set out to make the shirts. I dyed each shirt using the sink method and followed the directions right on the box for each color (blue, red, green and black).
If you decide to do this for your family, keep in mind that the shirts will fade after washing. If you want a true darker shade, make sure to dye for the maximum time and let sit prior to washing. Also, keep in mind the dying shirts is NOT a fast process. Expect to spend a few wet hours with you, some cotton, and a lot of stirring.
After the shirts were washed, dry and ready to go, I printed and cut the numbers. I used a simple inkjet printer and printed the numbers onto the transfers. I then cut them all out by hand. They TURNED OUT ADORABLE!
While on our trip I took an individual photo of each child as well as an insane amount some group photos. I put together the collage using Adobe PhotoShop Elements and added the title as well as the name of each child.
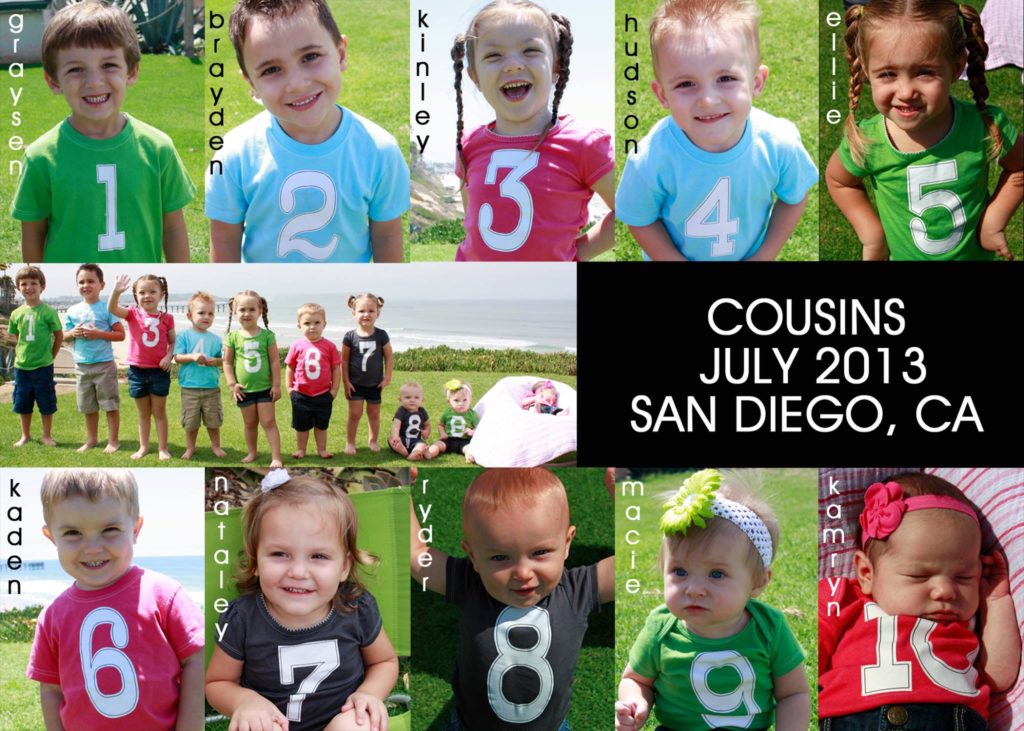
My absolute favorite part about this first one was not only that I loved it but that the whole family loved it. My mom works in the health field and sees patients daily who LOVED being about to see her growing family on her counter top.
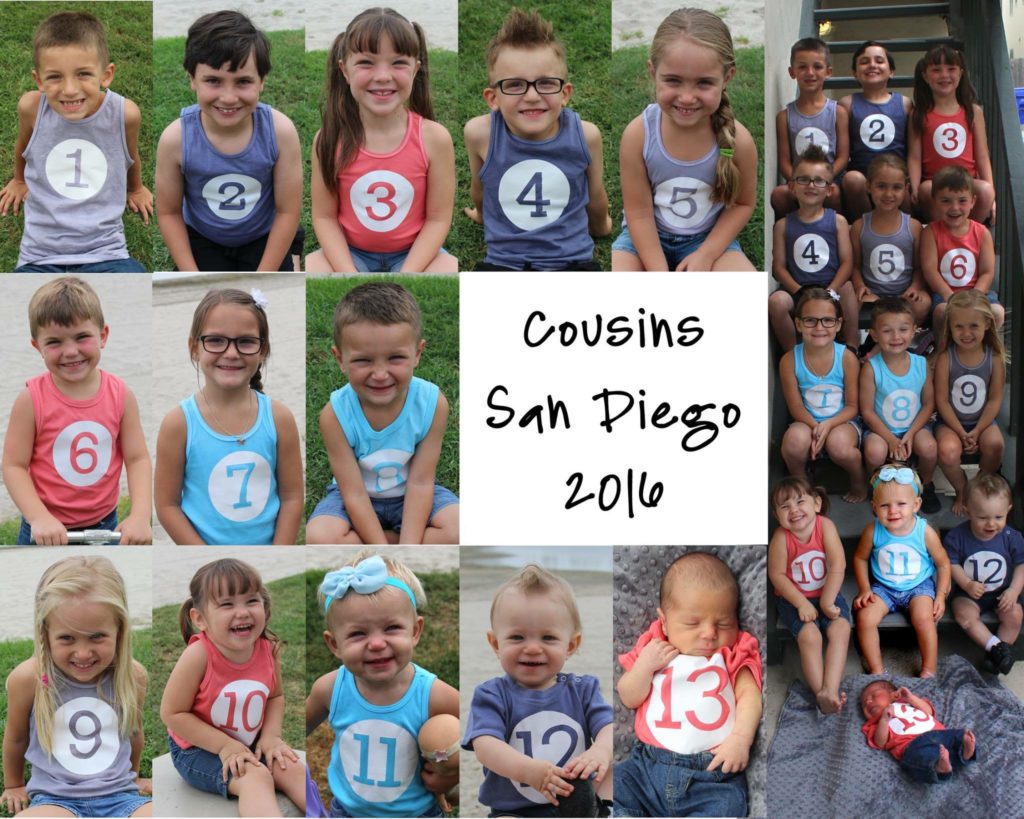
Fast forward a few years and we tried a few different things. In 2016 we decided to try out tank tops. I used the same method for dying each shirt, but this time they were tanks instead of T-shirts. (You will see that the babies got onesies and not tanks because, well they’re babies!)
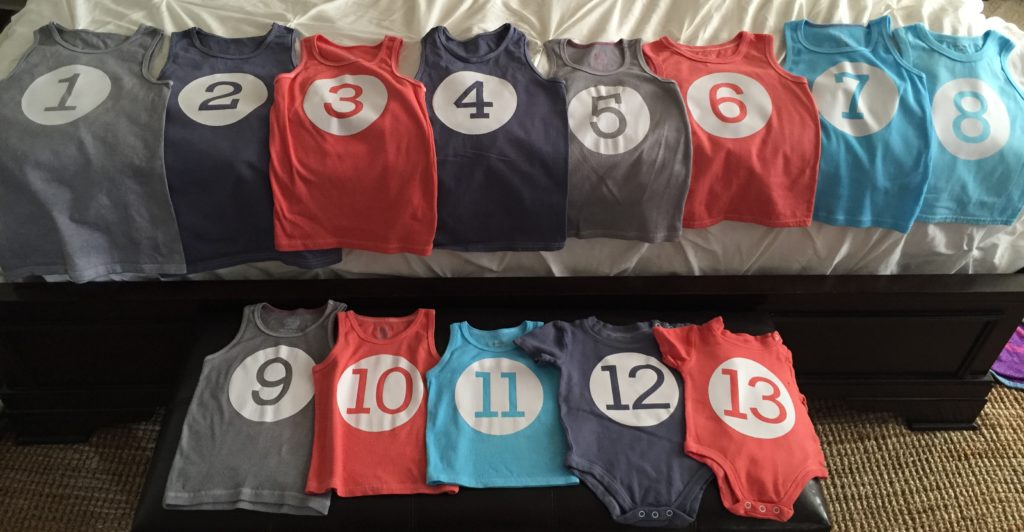
I also had purchased a Silhouette® Cutting Machine which allowed me to use white vinyl instead of simple iron on transfers and use the machine to cut the numbers. This was not only a HUGE time-saver but made for much cleaner numbers and better adhesion.
Our most recent trial in 2017, we changed things up once again. Instead of dying shirts and dealing with the mess and time of the dye process, we simply went to Old Navy. I could really go on and on about Old Navy all day long. I love their selection. I love that they have options for my entire family. I love that you can ALWAYS find something coordinated for every size. I love the price point. Okay, but seriously, I digress…
Of course, Old Navy had matching shirts for each family in the sizes I needed! The other super fun thing about this year was that my sister bought a heat press! Now, not only could we skip the dying and cut the vinyl with a machine, we could press the shirts in 10 seconds! WHAT?!?!?
The new press made things so fast that we decided to add each child’s name to the actual shirt. They turned out as adorable as ever!
I hope this has inspired you to take some cute, numbered photos with your extended family! Have you tried any other ways of photographing cousins or extended family? We would love to hear your ideas!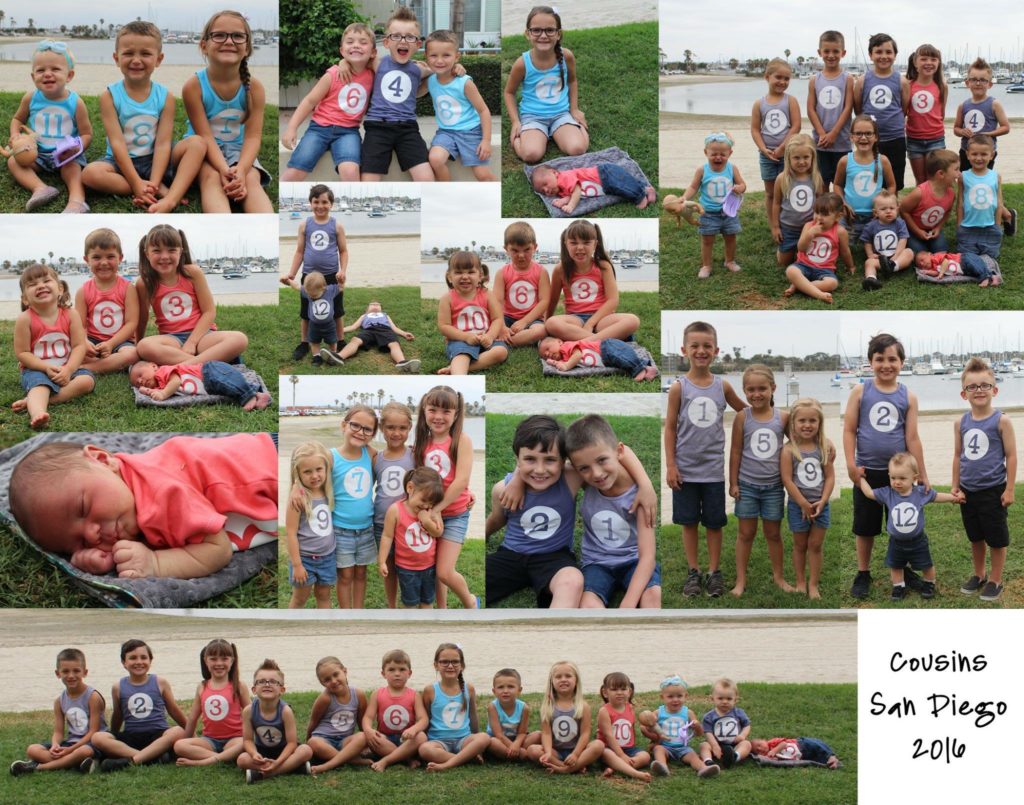


LOVE, LOVE, LOVE this idea! I will have to get our family’s cousins together and do this! What a cute idea and so many different options to choose from! Thanks for sharing this great idea. I’ll be back to join in on the chaos again soon!
Thanks, Sara! We had such a fun time with this!
Pingback: Matching Cousins' Shirts: Cousin Crew 2018 | Glutton for Chaos
Pingback: Cousins Photos with Matching Shirts: 2019 Version | Glutton for Chaos
I think this is so cute. What font did you use. Thank you
I don’t remember the exact font, but I remember we googled “free baseball font” and a bunch came up. Then we just tried a few to see which was best!